How to Add Categories and Tags to WordPress Media Library
Recently, one of our readers asked if it was possible to add categories and tags to images in WordPress media library. Adding categories and tags to images in media library can help you easily sort and locate images in WordPress. In this article, we will show you how to add categories and tags to WordPress media library.
Why Add Categories and Tags to Images in WordPress Media Library?
WordPress comes with a feature called taxonomies which allows you to sort your posts into categories and tags or even create your own custom taxonomies.
The default category and tags taxonomies are available for posts only. However, taxonomies can be added to any WordPress post type like pages, attachments, or any custom post type you may be using on your blog.
When you add an image to your WordPress posts or pages, it is stored in WordPress media library as an attachment. Attachment is a post type which means it can have its own taxonomies as well.
Adding categories and tags to your WordPress images can help you find and sort images more easily.
Method 1: Add Categories Images in WordPress with Media Library Categories
First thing you need to do is install and activate the Attachment Taxonomies plugin.
Media Library Categories plugin work out of the box and there are no settings for you to configure. Simply go to Media » Library and click on the list view button at the top.

This will open media library in the list view. Click on the ‘Edit’ link below any image and WordPress will take you to edit image page.
You will notice the new category meta box in the right hand column on the screen.

Click on add new category link to add a new category. You can also create sub-categories. See our guide on how to add categories and subcategories in WordPress to learn more about hierarchical taxonomies.
Once you are done, simply click on the update button to save your changes.
In order to display images or media filed under a category, you need to use the built-in WordPress gallery shortcode with extra category parameter.
[gallery category="14"]
Replace 14 with the ID of category you want to fetch your images from. See our guide on how to find category ID in WordPress.
Method 2: Adding Tags to Images in WordPress Using Envira Gallery
Envira Gallery is the best WordPress photo gallery plugin in the market. It allows you to create beautiful and mobile-friendly image galleries in WordPress.
Envira Gallery comes with a Tags Addon which allows you to add tags to images you add to galleries.
It is a paid plugin, and you will need at least a Silver license to access the tags addon. WPBeginner users can use this Envira Gallery Coupon to get 25% Off.
First thing you need to do is install and activate the Envira Gallery plugin.
Upon activation, you need to visit Envira Gallery » Settings page to enter your license key. You can get the key from your account on Envira Gallery website.
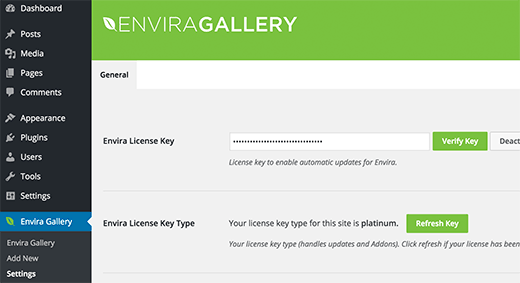
After verification, you need to visit Envira Gallery » Addons page. Locate or search for the Tags Addon and then click Install. Once installed, click on the activate addon button.
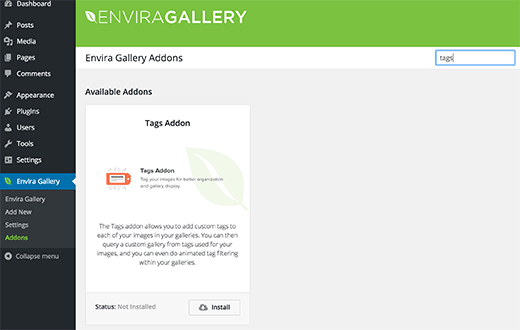
After activating the Tags Addon, you can create a new Gallery or edit an existing gallery. If you are new to Envira Gallery.
After adding an image to your gallery, you can click on the pencil icon on the image to edit its meta data.
Envira will open the image in a popup with the meta data fields in the right hand column. At the bottom of the meta data fields, you will notice the tags field.

Go ahead and type your tags.
If you are adding more than one tag, then separate each tag with a comma. Don’t forget to click on the save metadata button to store your changes.
Repeat the process to add tags to other images in your gallery.
You can also display tags in your gallery. Simply click on the tags tab when editing your gallery and check the box next to Enable Tag Filtering option.
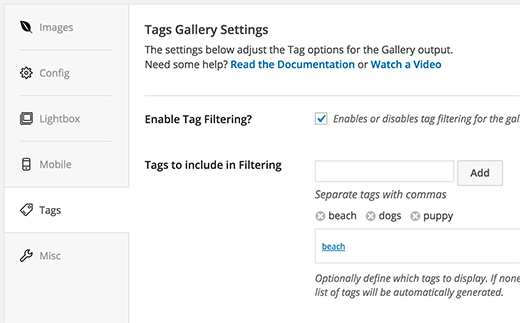
You can choose which tags to be displayed or excluded, sort tags alphabetically or manually, and other settings as well.
Once you are done, click on publish or save button to save your gallery.

That’s all, we hope this article helped you learn how to add categories and tags to WordPress media library.
live a comment with us
